Sunday, December 30, 2012

Logging Key Events on Mac OS X with JNA

In the previous post I introduced the APIs available in Mac OS X to get access to key events. The task was to write a small Eclipse plugin to log all keystrokes including hot-keys issued by the user while using the IDE. To my knowledge, this is not possible just using Java. The basic idea was to use JNA in order to call the native Objective-C APIs to log the key events.

Road Blocks

The first thing I tried was to write a simple call to Cocoa's NSEvent API (as outlined last time) via JNA. As a reminder, the goal was to implement this one-liner in JNA:

    [NSEvent addLocalMonitorForEventsMatchingMask:NSKeyDownMask 
                                          handler:
      ^NSEvent *(NSEvent * event) {
       /**
        * Here goes your logging...
        */
        return event;
    } ];

Easy, right?

Not quite so easy, as I had to find out. First it's Objective-C: You can't do it in JNA out of the box. As you may know, a message in Objective-C is sent to a class ( javaish: a static method is called ) like this:

   [classname messagename:argument]

The compiler translates this into something that could also be expressed as:

   Class cls = objc_getclass(classname);
   SEL selector = sel_registerName(messagename);
   objc_msgSend(cls, selector, argument);

It starts by looking up the class in the Objective-C runtime (l.1: objc_getclass). Then (l.2), sel_registerName registers a message name with the runtime. In our case, the message has already been registered (remember we are trying to call an existing API), so this function just returns the so called selector identifying the message. The last call actually tries to send the message to the class as the receiver.

This API exposes quite clearly the dynamic nature of Objective-C, which is based on message passing to receivers determined at runtime instead of just calling methods on entities defined at compile time.

You might wonder why these low-level functions are exposed in the Objective-C runtime at all. The reason is that they allow you to write all sorts of bridging layers between Objective-C and other languages. As a matter of fact, there used to be an Apple-provided Java-Objective-C bridge.

Well, not any more. Java on the desktop seems to be considered legacy technology by Apple. So we have to build all this by hand in JNA. Still no big deal, as we just need the three methods just mentioned out of the runtime API.

import com.sun.jna.Library;
import com.sun.jna.Native;

public interface ObjC extends Library {
 
 public static final ObjC INSTANCE = (ObjC) Native.loadLibrary("objc", ObjC.class);
 
 public void objc_msgSend(Object id, SEL theSelector, Object...objects);
 
 public Class objc_getClass(String name);
 
 public SEL sel_registerName(String str);

}
All there is left to do now is to call [NSEvent addLocalMonitorForEventsMatchingMask: handler:] from Java using the methods now available via JNA.
  ObjC objc = ObjC.INSTANCE;
  Class cls = objc.objc_getClass("NSEvent");
  objc.objc_msgSend(cls, objc.sel_registerName("addLocalMonitorForEventsMatchingMask:handler:"), mask.getMask(), block);  

Brilliant. Except it does not work. Why? Well, if you scroll to the very right in the code snippet—ignoring the mask.getMask() statement to define the event mask—you will notice that the last argument of the method is something I clumsily named block, because it's an Objective-C block acting as the callback when a key event is received. So surely this must work just like a function pointer, I thought. Not quite. Time to look at blocks in more detail.

Objective-C Blocks and JNA

Blocks are a C-level language feature built into the compilers that ship with Mac OS X since 10.6. They are closures capturing the enclosing lexical scope. So calling from Java you cannot just use com.sun.jna.Callback instead and pray that it works.

One of the reasons why this won't work is that you would pass in a function pointer where actually a pointer to a block literal would be expected.

A block literal is a C struct of the following form:

struct Block_literal_1 {
    void *isa; 
    int flags;
    int reserved; 
    void (*invoke)(void *, ...); //function pointer
    struct __block_descriptor_1 *descriptor;//omitted for brevity
    // imported variables go here
};

The important part for now is that it contains a pointer to a function with the logic you put into your block. You will find that this function pointer is located at offset 16 (assuming x86_64). The struct contains an isa pointer (8 bytes, so it's structurally also an Objective-C object!) and two integer fields (4 bytes each) followed by the function pointer.

If we then look at how the call of the block looks like in assembly we find another difference from a regular function pointer. We assume that a pointer to the block literal is stored in %rax and a pointer to the argument for the block (in our case an instance of NSEvent) is held on the stack at -32(%rbp). An invocation of the block could look like this:

0x100001452:  movq   %rax, %rdx //copy the block literal pointer to %rdx
0x100001455:  movq   -32(%rbp), %rsi //copy the argument to %rsi
0x100001459:  movq   %rdx, %rdi // copy the block literal pointer to %rdi
0x10000145c:  callq  *16(%rax) //call the function contained in the block literal (offset 16 remember)

The block function is thus invoked with the block literal as the implicit first argument and all other explicit arguments follow shifted by one place. In our case it's just the pointer to the NSEvent instance that comes in %rsi instead of %rdi as you would expect for a regular function call.

Even if you managed to get your function pointer in there, it would never be executed. The calling code expects the actual function pointer at *16(%rax) and it uses a different calling convention with the added block literal argument in the first position.

So in order to make this work from JNA, you would need to fabricate a structure isomorphic to the ones created by the compiler for Objective-C blocks and pass that instead. This would require a change to JNA itself.

Two Solutions

If you are free to choose your dependencies, you could just give up on JNA and use either JNI or give BridJ a try. BridJ seems relatively immature compared to JNA but it implements support for Objective-C blocks. It is actually done by creating an empty block as a template and then manipulating the function pointer inside the struct.

But I did not want to introduce another dependency just for the Mac OS version of the plugin or resort to JNI, consequently my solution was to implement a Quartz event tap using JNA. As explained in the last post, this is a low level C-API intended for the implementation of assistive devices and such. It works with JNA because it does not use blocks. If you are interested in the code it can be found here.

Friday, December 28, 2012

Logging Key Events in Mac OS X

A friend asked me to look into writing a Mac version of a little Eclipse plugin he had been developing for Windows. What it does is it records all your keystrokes in order to allow you to analyse your typing efficiency and to "eliminate" unnecessary keystrokes :-)

I liked the idea as it was a bit on the out of the ordinary side of things. Especially because one of the requirements was to be able to record the use of hotkeys and all of this was supposed to be done from within a Java application (I will cover that aspect in a separate post)

As far as I know, there are three ways of achieving this goal with the public APIs provided by Apple:

  1. Using Cocoa's NSEvent class
  2. Carbon's InstallApplicationEventHandler API
  3. Core Graphics offers a low level C API

Cocoa

By far the easiest approach is to use the Cocoa API. It's basically a one-liner:

    [NSEvent addLocalMonitorForEventsMatchingMask:NSKeyDownMask 
                                          handler:
      ^NSEvent *(NSEvent * event) {

        // Here goes your logging...
        return event;
    } ];

This works great. It gives you all the information you would want about pressed modifier keys etc. The callback is implemented as an Objective-C block, which is nice and concise.

Carbon

If you can't use the Cocoa API for some reason, you could give the old Carbon API a go. Documentation is scarce as Carbon is considered legacy technology by Apple. But it's not hard to come up with something similar to this:

/**
 * The callback function
 */
pascal OSStatus KeyEventHandler(EventHandlerCallRef  nextHandler,
                                EventRef             theEvent,
                                void*                userData) {
    
    // here goes the logging
    return CallNextEventHandler(nextHandler, theEvent);
    
}

/** --------------snip ------------------**/

    EventTypeSpec eventType;
    EventHandlerUPP handlerUPP;
    
    eventType.eventClass = kEventClassKeyboard;
    eventType.eventKind = kEventRawKeyDown;
    handlerUPP = NewEventHandlerUPP(KeyEventHandler);
    InstallApplicationEventHandler(handlerUPP,
                                   1, 
                                   &eventType,
                                   NULL,
                                   NULL);

There is one small catch though: it won't work from Cocoa apps, because the key events will never reach the Carbon event monitor. While I haven't quite figured out why it does not work, my suspicion is that you have to have a Carbon event loop running in order to listen for the raw key events. While there is some bridging code in [NSApplication sendEvent:] calling Carbon's SendEventToEventTarget, it does so only for hotkey events and not for every raw key event.

Quartz

But all is not lost because there are still Quartz Event Taps to help you out. This API was originally designed to support the implementation of assistive devices. That's why the user has to enable the accessibility features in System Preferences for you to be able to install a Quartz Event Tap (or the process must run with root privileges).

The API is similar in structure to the Carbon version. You need a callback function:

CGEventRef keyDownCallback (CGEventTapProxy proxy, CGEventType type, CGEventRef event, void *refcon) {
    /* 
     * do something with the event here
     *  turn Xs into Us if you want ...
     */
    return event;
}
Being a low level API, it gives you much more control about where you place your tap: you can get at the events as they enter the window server, the login session or when they are annotated to go to your application.
    CFMachPortRef keyDownEventTap = CGEventTapCreate( kCGHIDEventTap,
                                                      kCGHeadInsertEventTap,
                                                      kCGEventTapOptionListenOnly,
                                                    CGEventMaskBit(kCGEventFlagsChanged) | CGEventMaskBit(kCGEventKeyDown),
                                                      &keyDownCallback,NULL);

    CFRunLoopSourceRef keyUpRunLoopSourceRef = CFMachPortCreateRunLoopSource(NULL,
                                                                    keyDownEventTap,
                                                                    0);
    CFRelease(keyDownEventTap);
    CFRunLoopAddSource(CFRunLoopGetCurrent(),
                       keyUpRunLoopSourceRef,
                       kCFRunLoopDefaultMode);

    CFRelease(keyUpRunLoopSourceRef);

It is also well worth noting that the method shown above creates a global event tap that listens to all events not just the ones going to your application. There is

CFMachPortRef CGEventTapCreateForPSN(void *processSerialNumber,
  CGEventTapPlacement place, CGEventTapOptions options,
  CGEventMask eventsOfInterest, CGEventTapCallBack callback,
  void *userInfo)
to tap into the events targeted at a specific application.

Friday, August 31, 2012

Publishing Your Dissertation With LaTeX

I published my doctoral dissertation. As I used LaTeX to write it in the first place the publisher agreed to let me do the typesetting myself. This way I believed I would avoid a load of extra work converting it all to MS Word and all the annoyances that come along with it. While I am happy with the result in terms of typesetting quality, doing it all in LaTeX turned out to be quite a messy process that took me almost a year.

1. Fundamentals: jurabib hacking

Most of the complexity was hidden in subtle problems I had not foreseen. The main obstacle that consumed most of my time was caused by a decision I made years ago, when I decided to use the jurabib package to manage my references. By the time I was ready to publish the dissertation the package was not actively supported anymore. Instead there was biblatex, which looked very promising but did lack one feature I could not live without (support for archival records is essential for historians). I ended up adapting the official jurabib package to my needs (which were not fully covered by the original package), which took me at least 3 months —working in my spare time after my full-time job. Before that I had only been a user of LaTeX. While I felt comfortable using the higher level API, I had to learn La/TeX from scratch in order to do some more serious stuff. I got there mostly by reading parts of Knuth's TexBook and getting hints from the Internets. What I found out about jurabib was not very encouraging. Some implementation details seemed like a hack to me once I started understanding what was going on. My modifications did not help in any way making it look nicer or more robust. I just tried to coerce it somehow to follow my will. The result is probably not worth sharing but it did what I needed it to do.

2. XeLaTeX or LaTex?

I first jumped on to the XeLaTeX train, which seemed to make my life easier because I was able to use the OpenType fonts installed on my system. At same time I had to convert everything into UTF-8 because for some unknown reason I could not get the

\XeTeXinputencoding 
switch to work. But the showstopper was that the quality of the typesetting simply did not match the printed books I used as references. The main reason for that is that XeLaTex does not yet support the microtypography features that are available in LaTaX through the microtype package. I reverted back to LaTeX and used fontools' autoinst, which is basically a wrapper around LCDF TypeTools. It turned out to be not hard at all to use my system's OpenType fonts that way.

3. Adaptation to my publisher's requirements

My only guidance as to what the result should look like was an example of another book published in the same series and some general information from my publisher. I used that and Mac OS X's Preview program to get a feel for sizes and proportions of the intended result and used What The Font to identify the fonts. It felt weird figuring out the layout that way. I think this awkwardness was due to the publisher's workflow clearly being geared towards a MS Word centric approach, where all the typesetting happens at the publishing house. I had used KOMAscript to typeset the initial version of the text, which I submitted to my university. This turned out to be the next roadblock. There was a stark dissonance between what my publisher demanded and what the author of the KOMA templates deemed acceptable in an effort to educate his users towards his understanding of typesetting. Again I was reluctant to abandon the KOMA packages completely as they also offered much valued functionality in other areas.

My main difficulty was font sizes where I had to do nasty things like this:


\KOMAoption{fontsize}{10.5pt}
\makeatletter
%hacking to 11pt
\def\normalsize{%
\@setfontsize\normalsize\@xipt{12.75}%
\abovedisplayskip 11\p@ \@plus3\p@ \@minus6\p@
\abovedisplayshortskip \z@ \@plus3\p@
\belowdisplayshortskip 6.5\p@ \@plus3.5\p@ \@minus3\p@
\belowdisplayskip \abovedisplayskip
\let\@listi\@listI
}
\makeatother

I just did not find another solution. If I had had the time, the clean solution might have been to write my own template based on one of the default LaTeX templates instead.

4. Indices

Just one thing: Make sure they are ordered correctly even if you have got words/titles with umlauts in them ...

Conclusion

What does this all mean? Don't do LaTeX? Not at all, quite the opposite! Do it! Apart from the jurabib issue which was really painful, the other points mentioned here were lessons to be learned rather than unsurmountable obstacles. So by all means do it, maybe choose your packages wisely. Using TeX saved me a lot of tedious manual work while preparing indices and managing references and it also gave me professional grade typesetting on top of that.

Thursday, August 30, 2012

The Cost of Apache Commons HashCode

I had a discussion at work today about the cost of object creation in Java. It was about the way you are supposed to use Apache Commons HashCodeBuilder and EqualsBuilder creating a new object on every single call to hashcode() or equals():

@Override
public int hashCode(){
    return new HashCodeBuilder()
        .append(name)
        .append(length)
        .append(children)
        .toHashCode();
}

While I was pretty sure that the cost of creating these short lived objects on a modern JVM was pretty negligible in most use cases, I had no numbers to prove it.

Time for a biased benchmark of the simplest kind like the following:

package org.blogspot.pbrc.benchmarks;

import java.util.HashSet;
import java.util.Random;
import java.util.Set;

public class Runner {

 private static final int NUM_ELEMS = 100000;
 private static final int NUM_RUNS = 100;

 public static void main(String[] args) {
  String[] keys = createKeys();
  Integer[] numerics = createNumericValues();

  // priming the jvm
  for (int i = 0; i < 5; i++) {
   manualEqualsTest(i, keys, numerics);
   autoEqualsTest(i, keys, numerics);
  }

  long time = 0l;
  for (int i = 0; i < NUM_RUNS; i++) {
   time += manualEqualsTest(i, keys, numerics);
  }
  System.out.format("%s %.4fsecs\n", "Manual avg:",
    (time / Double.valueOf(NUM_RUNS)) / 1000000000.0);

  long autotime = 0l;
  for (int i = 0; i < NUM_RUNS; i++) {
   autotime += autoEqualsTest(i, keys, numerics);
  }
  System.out.format("%s %.4fsecs\n", "Apache commons avg:",
    (autotime / Double.valueOf(NUM_RUNS)) / 1000000000.0);

 }

 private static long autoEqualsTest(int runNumber, String[] keys,
   Integer[] numerics) {
  Set<CommonsEqualsAndHashcode> autoObjs = new HashSet<CommonsEqualsAndHashcode>(
    NUM_ELEMS);

  long start = System.nanoTime();
  for (int i = 0; i < NUM_ELEMS; i++) {
   autoObjs.add(new CommonsEqualsAndHashcode(keys[i], numerics[i]));
  }

  return System.nanoTime() - start;
 }

 private static long manualEqualsTest(int runNumber, String[] keys,
   Integer[] numerics) {
  Set<ManualEqualsAndHashCode> valueObjs = new HashSet<ManualEqualsAndHashCode>(
    NUM_ELEMS);
  long start = System.nanoTime();

  for (int i = 0; i < NUM_ELEMS; i++) {
   valueObjs.add(new ManualEqualsAndHashCode(keys[i], numerics[i]));
  }

  return System.nanoTime() - start;
 }

 private static Integer[] createNumericValues() {
  Integer[] result = new Integer[NUM_ELEMS];
  Random rand = new Random();
  for (int i = 0; i < NUM_ELEMS; i++) {
   result[i] = rand.nextInt();
  }
  return result;
 }

 private static String[] createKeys() {
  String[] result = new String[NUM_ELEMS];
  RandomString rand = new RandomString(32);
  for (int i = 0; i < NUM_ELEMS; i++) {
   result[i] = rand.nextString();
  }
  return result;
 }

}

I used two—otherwise identical—immutable value types: one with hand-crafted equals() and hashcode(), the other using Apache Commons HashCodeBuilder and EqualsBuilder.

package org.blogspot.pbrc.benchmarks;
public class ManualEqualsAndHashCode {

 public final String val;
 public final Integer numeric;

 public ManualEqualsAndHashCode(String val, Integer numeric) {
  this.val = val;
  this.numeric = numeric;

 }

 @Override
 public boolean equals(Object obj) {
  if (obj == this) {
   return true;
  }
  if (!(obj instanceof ManualEqualsAndHashCode)) {
   return false;
  }
  ManualEqualsAndHashCode other = (ManualEqualsAndHashCode) obj;
  return other.val.equals(this.val) && other.numeric.equals(this.numeric);
 }

 @Override
 public int hashCode() {
  int result = 17;
  result = 31 * result + val.hashCode();
  result = 31 * result + numeric;
  return result;
 }

}

I got the following results on a 2 GHz Intel Core 2 Duo with 4 GB 1067 MHz DDR3 running OS X 10.8.1 (12B19) with Java 1.7.06


Manual avg: 0.4052secs
Apache commons avg: 0.4508secs

In this particular scenario the overhead—when using the Apache Commons classes—amounts to about ten percent. Depending on where you're coming from, this might be a price worth paying. But, of course, this test scenario of just putting items into a collection is highly synthetic so your mileage may vary.

Now go and find more flaws in the benchmark!

Monday, October 27, 2008

Digging into Spotlights localization

On Mac OS X 10.5 Spotlights localization seems somewhat flawed. I never managed to get the german Metadata Predicates working. If you wanted to search for dates like "Datum:Heute" spotlight simply did not return any results.

The documentation on Apples website is surprisingly poor. Helpful where the following:
http://davidavraamides.net/files/digging-into-spotlight.html

and a russian site
http://macovod.net/2008/05/spotlight-i-russkij-yazyk/

In the russian version of Mac OS localized search predicates seem to be partially disfunctional too. In my german localization it was especially the Date predicate that did not work.

Spotlight/Finder Search Localization information is stored in three different places.

1. Metadata Framework
2. Spotlight Application
3. Finder Application

1. /System/Library/Frameworks/CoreServices.framework/
Versions/Current/Frameworks/Metadata.framework/Versions/Current/Resources

Relevant files: MDPredicate.plist (maps predicate variable names like "DOCUMENTS" or "TODAY" to metadata queries formulated in the query language which is documented on the apple developer site

Inside the localization directories (here: German.lproj): MDPredicateKeywords.plist: maps the localized predicate descriptions to the predicate variables described before e.g. TODAY -> Datum:Heute. I replaced this file with the english version, in order to get the predicates working again. This implies that a localization issue is the cause of the malfunction.

The file schema.strings in the same directory has relevant information about all possible file attributes that can be used in the spotlight queries. Look for "ShortName".

2. /System/Library/Frameworks/CoreServices/Spotlight.app contains localization information for the spotlight menu and the drop-down result list

3. /System/Library/Frameworks/CoreServices/Finder.app
The file MDSliceAttributeNameOverrides.strings overrides as its name implies attribute names defined in the schema.strings file in the metadata framework. A comment explains that this is done to correct certain attributes that look "awkward" in the Finder

MDSliceStrings.strings defines the strings for the advanced search in finder. A comment implies that special care has to be taken here in order to avoid conflicts with attributes overridden in MDSliceAttributeNameOverrides.strings

MDDateFormatter.strings contains Date information.

Tuesday, November 21, 2006

Automatically mount samba shares with pam_mount

I wanted to mount a samba share on login whitout any fancy stuff like encrypted home directories or even single sign on. For my convenience and to cope with my fainting memory, some notes how to do it:

I am configuring a standard ubuntu installation where pam is simulating traditional unix authentication (pam_unix.so).

1. Install pam_mount and read the documentation

apt-get install libpam-mount

The relevant documentation is scattered around the files (Debian/ubuntu):
/etc/security/pam_mount.conf
/usr/share/libpam-mount/README.gz
/usr/share/libpam-mount/README.Debian.gz

Usefull howto-style pages on the web:
http://www.novell.com/coolsolutions/feature/15354.html
http://linux.blogweb.de/archives/189-Automount-the-PAM-way.html

2. Include pam_mount in the relevant pam configuration files
pam_mount works as an auth module. You have to include

@include common-pammount

into the login modules you use. In my case /etc/pam.d/login and /etc/pam.d/gdm
As stated in the tutorials and the module documentation mentioned above, you have to paste the include statement after the common-auth und common-session include statements

If you want to allow user specific configuration files, uncomment luserconf in
/etc/security/pam_mount.conf

Add necessary mount options to options_allow (in my case e.g. credentials,iocharset and username – see below)

3. Configure your personal .pam_mount.conf
The hardest part to figure out (it is a one-liner).

volume my_linux_username cifs server volume_on_server mount_point
username=win_username,credentials=/path/to/.smbcredentials,
iocharset=utf8,nosuid,nodev - -


Don't forget to include two dashes. They are fill-ins for the encryption options i do not use.

The tricky part was to get pam_mount to use a special username for authentication at the windows server and not my linux username, as they are not identical. pam_mount includes automatically the username you specify as second argument in the configuration file into the mount options. My problem was that my linux username and my username on the windows machine were not the same. The fact that i specified my samba credentials in a file did not help. The workaround is the extra username argument in the example above. If you look at the resulting command pam_mount will build out of your configured credentials (/var/log/auth.log), you will see that pam_mount will pass two username parameters to the mount command, but it will work the way intended.

Pam_mount will give you an error in the logs even if it succeeds, which is irritating. There is an explanation on the pam_mount mailinglist though.

Pam_mount does not work "out of the box" in ssh sessions. There are some hints in the pam_mount FAQ (typically /usr/share/doc/libpam-mount/FAQ.gz, but i have not managed to make it work yet.

Saturday, October 14, 2006

Deploying PHP with Capistrano

If you are looking for an automated way to deploy your php application you'd problably stumble over this blog post. So did I.

I wanted to try this on ubuntu Dapper. But there was no ruby, so I did:

apt-get install ruby
apt-get install rdoc

Then i fetched the rubygems archive from:
http://rubyforge.org/frs/?group_id=126

Follow the instructions of the README. I got an error message the first time i tried to install it because the rdoc package was missing from my ubuntu installation (see above the apt-get).

setup.rb failed too. After further google research i found this comment:

At this point you must MAKE SURE you install gems from the top
of directory you unpacked it to, otherwise you will get an error
stating

.... ./post-install.rb has failed
"No such file or directory - pkgs/sources"

Hope this helps someone, Thanks everyone.


Then i followed the instructions on simplistic complexity i mentioned in the beginning.

gem install capistrano
...

On Dapper i needed an additional apt-get install libopenssl-ruby for capistrano to install.

You still have to make sure that pubkey authentification is setup correctly for your target server. You need subversion (at least the client) installed there too, if you want to use capistranos default deployment procedure and your php application's filesytem layout should be ruby-like in order to make things easy.

The fact that your doc_root changes to /path_to_your_php_app/current is mentioned as well on simplistic complexity. Once you are set up it makes life lot easier.

Sunday, August 27, 2006

ibook hd replacement

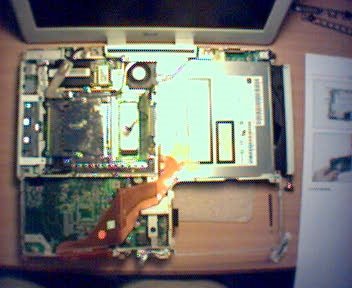
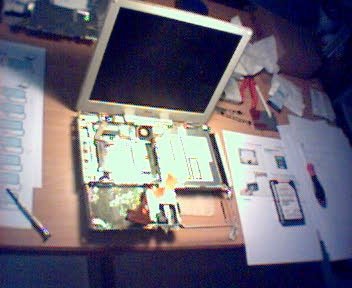
Installed a new harddrive (HTS721080G9AT00) yesterday on my 3.5 year old ibook g3. Used the excellent instructions from pbfixit.com. It was not easy but certainly doable. Messed up the lower case a little bit, but you won't see the scratch if you don't know what you're looking for. So everything went fine.

I noticed that the Apple guys who replaced my logic board when i got the notorious problem, did a pretty good job ruining a couple of screws and even a torx.
The yellow tape, described in the instructions from ifixit, i found removed by apple care. Besides the instructions were excellent, if you don't mind some small inaccuracies.

The fun part was reinstalling my system software and restoring the backup. I had about 25 GB of data and approx. 18 GB on my backup medium. So there was no way of backing up the whole system avoiding the need to install everything from scratch (compiling my mysql, postgres, php ... fink, darwinports). Long story short: made a partial backup consisting mainly of my home directory – reinstalled Mac OS ... restored the backup.


ditto -V /Users/myname /Volumes/myIpod/myname
ditto -V /Volumes/myIpod/myname /Users/myname


Most interesting/frustrating part: this procedure corrupted the spotlight metadata. Folders were not folders anymore. They had no kMDItemKind of public.folder or something like that. Even erasing the whole index by

mdutil -E /

and waiting 45 min. to reindex the Volume was of no avail. After playing around with the spotlight tools i found the following:


  1. I was able to recreate the index and metadata by using mdimport folder

    I actually used

    mdimport -d1 folder

  2. and discovered to my great dismay that i got lots of errors like the following:

    mdimport[6456] Importer using too much memory
    (147 MB), hit critical threshold.
    Last file imported was: ...

    I could not see a pattern why this was happening. In some (most?) cases this behaviour was triggerd by larger files (around 10 MB of PDF), but sometimes it was simply erratic. Importing problematic files again helped.

  3. Getting Metadata and index back for Mac OS related Applications like iCal or Adressbook was as simple as deleting the ~/Library/Caches Directory